Beyond Reality with Giulianna Marie

Beyond Reality with Giulianna Marie

Photograph taken by @futbolesbomb

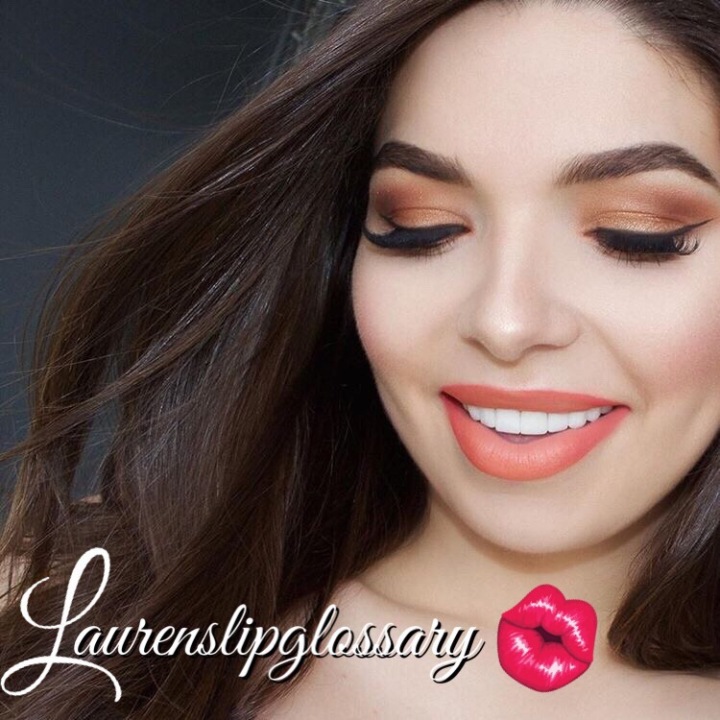
Hey my beauts, and welcome back to my channel! Thank you so much for dropping in and stopping by, I greatly appreciate it beyond words. I absolutely love blogging for you guys and just want to take the time to say thank you so much for the support over the years, you guys are awesome! Thank you so much for following my blogging channel as well, I love hearing from you guys! I hope you all are enjoying my channel as well, if you any types of blog posts you would like to see and view please don’t hesitate, I love suggestions! So I bet you guys are wondering who I am going to collaborate with today and I am beyond excited for this collaboration you beauts. This beautiful lady is only 20 years old and has a strong passion towards makeup and the makeup industry. I have looked up to her for a while now, and her posts always greet me on Facebook, especially cause Halloween is right around the corner. Her style of makeup and techniques are phenomenal, and I highly recommend checking out her Instagram if you have not already. I am super excited to announce I have collaborated with the gorgeous Giulianna Marie in regards to her makeup and beauty related career.

For starters, I want to welcome Giulianna to my channel and it’s such a pleasure having her here! I can not believe you are only 20 Giulianna that blows my mind, you have such an amazing talent and are going so far in life. Giulianna finished two years of college but is currently taking time off to focus on makeup at the moment. She plans on going to school next year but is hoping that the time off will open new doors and opportunities for her. I wanted to ask Giulianna right away when she first started getting into makeup and becoming involved with the makeup industry. Giulianna states “I did some makeup when I was very young, playing around with those huge cheap sets for little girls. I started wearing eyeshadow every day in high school and began my beauty Instagram my senior year”. Something that absolutely blows my mind completely was that Giulianna was self-taught. How incredible is that? You would think with a talent like hers that she must have been taught by professionals or something but nope, completely self-taught!

I was very curious as to how long Giulianna spends editing and making her videos since she does have a Youtube account which is Giuliana Marie. Giulianna expresses, “I’ve been disappointingly inconsistent with youtube, but I’m currently doing 31 days of Halloween and uploading a new video every day. One video takes me anywhere from 4-10 hours of filming and editing”.  Beauts, check these amazing Halloween Tutorials that she has come up with and shown on her channel, I am beyond amazed and floored by her talent.

Tears for Humanity

Serpent 

Two Faced

The Joker

The Devil Inside


Cat Fight 
A Creepy Clown 


How crazy good are these though?!

I wanted to know what makes Giulianna comfortable in front of the camera and to my surprise, she isn’t that comfortable yet and intends to work on it. Could’ve fooled me for sure!

What is one you tuber you watch that deserves more views/ subscribers
then they have? “I don’t watch any YouTubers really. But my friends Jill Foran and David Steinberg both have youtubes and are definitely underrated based on their artistry but also how much time they put into their videos”. 

How long does it take you to prep for a video? “About a half hour just to do my base and get my studio clean enough”. 


Photograph taken by @Johncotter

I was very curious as to how long it takes for Giulianna to get ready in the morning! For me, it depends what kind of mood I am in and if I feel like putting makeup on and getting myself all dolled up or not. Sometimes I can take two hours, other times I can take 10 minutes. Giulianna states, “I don’t usually wear makeup everyday unless its a special occasion, just because I feel like its a waste of time if I’m not going to post it on Instagram. I would like this to change and start to dedicate an hour a day to make myself feel good in the morning. if I go out, ill spend 1-2 hours getting ready”.  I hear you Giulianna, I am the same way, I always think it’s such a waste but when you get yourself all dolled up and ready, you really do feel happier and more upbeat about starting your day! It makes your day more enjoyable knowing that you look great and feel good about yourself.

I also wanted to know who inspires Giulianna to do her makeup. She goes on to explain that she is inspired by many colour combinations, different styles and her emotions.

“…there is a way to be good again”- The Kite Runner 


What is a quote or phrase that you live by? “…there is a way to be good again…” – The Kite Runner (my favourite book)”. 

Being a beauty guru, I had wondered if Giulianna had attended any beauty events or special events before. She explains, “I have attended GenBeauty and IMATS”. That’s fantastic! Those would be such good events to go attend to and you would learn so much as well! I then asked Giulianna if she does freelance makeup before for any clients? She explains that she has done a few people in her town makeup before, but does not really do any freelance makeup. Giulianna states, “doing other people’s makeup makes me nervous”.  I am the same way! I absolutely love doing my own makeup and experimenting with makeup products and what not,but when it comes to doing other people’s makeup I am afraid to mess up and do something wrong, or I am scared they will not like it! I personally would just rather stick to doing my own makeup.

I know that Giulianna has a lot of followers on her social media sites, especially on Instagram, with a stunning 451, 000 followers. That is incredible, way to go! I was curious as to how long it took to achieve this. Giulianna expresses, “I only have a substantial following on Instagram, and I’ve been for about 2.5 years now. I’d like to be a lot further in my career”.  Still, that’s amazing, and I have no doubt that you will achieve this goal of yours Giulianna!


One piece of advice you would give to someone who was just starting out in the beauty industry? “Be prepared because it can really take a toll on you. Make sure it’s something you really want”. I had also wanted to know what other hobbies she enjoys doing besides makeup! She states, “Not much! I used to paint and draw all the time. but now I spend most of my time on makeup”. I hear you! I spend most of my time blogging, and when individuals ask me what else I like to do in my free time, I have a really hard time coming up with an answer for them!

I then asked Giulianna how she would explain her makeup techniques and style. Giulianna states, “hmm, I definitely prefer heavy makeup for my daily looks (like super dark smokey eyes). I would also describe myself as a detail-oriented perfectionist because I spend so long on my looks”. 

How do you come up with your looks? “I plan them, draw sketches and make tons of lists then pick which I want to do”.  I also asked Giulianna who her favourite beauty guru was. Giulianna explains that her favourite beauty guru is Samantha!


I always am so curious about this question and always wonder what makeup artists would say! I asked Giulianna what was one piece of makeup that she could not live without. She states, “Ugh, how can I pick one? Probably purple eyeshadow, or black gel eyeliner. But realistically, foundation or concealer as well, haha. I can’t choose one!”. I think for me, I personally could not live without my eyebrow products seeing as I hardly have any eye brows, to begin with! I would for sure need my brow products, they are a necessity!

Finally, wrapping up my collaboration with Giulianna Marie, I asked her where she sees herself 5 years from now. Giulianna expresses, “well I hope that by then I’ve had a “big break” and have established myself enough to be making substantial money, and have a nice house or apartment. I would like to get married around that age as well and start planning for kids. But I also want to be financially stable first, so hopefully, I’ll be bringing in the dough and own my own business/brand by then! HOPEFULLY. I stress about this every day”. I have so much faith in you Giulianna! You are by far one of the most talented makeup artists I have ever seen and I really wish nothing but the best for you! It was an absolute honour working with you on this blog post and having you as a special guest! I just want to thank you again! I hope all you beauts go help and share some love on her Instagram page which is “guiliannaa” and her link for her youtube channel is located in the link within her bio on her Instagram Page.

Drops of Jupiter

I hope you beauts enjoyed this collaboration with the gorgeous Giulianna Marie, and be sure to follow my other social media accounts located on my homepage for upcoming blog posts in the near future! Take care!

img_6499


Autumn Evening Makeup TutorialΒ 

Autumn Evening Makeup TutorialΒ 

Good morning my lovely beauts ! I hope you all have a fantastic Monday today ! I know I am going to try to even though I have class from 8-6 today … fml majorly. Hey that’s school though what can you do! So today’s makeup tutorial is going to be a step right after my copper makeup look! So if you haven’t checked out my last makeup tutorial, check out that one cause after your finished look from that one, you are going to do a couple more steps to achieve this beautiful copper evening makeup look for today! I love experimenting with fall colours and came up with this gorgeous look for autumn! Let’s get started!

So the finished look from the copper tutorial looked something like this!


You are then going to take that same Morphe 350 shimmer palette and go in with this stunning dark brown shade. I am applying this over top of my copper shade, focusing on the outer corners of my eyes and dragging this colour into the crease as well. Since it is a dark colour , you want to ensure that you blend it well and be patient with it!


I then am grabbing this same colour and putting a little bit underneath my lower lash line, just to make my eyes pop! I grabbed my NYX Cosmetics liquid lip lingerie in the shade Embellishment and applied this to my lips. I added some fake lashes to create a more dramatic autumn look and voila! You are done!


“On a bad day, there’s always lipstick”


I hope you beauts enjoyed this continuation of my last makeup look! This is perfect for date night or a night out! Be sure to follow my other social media accounts located on my home page! Happy Monday!

img_3261-13

Everyday Fall Copper Makeup TutorialΒ 

Everyday Fall Copper Makeup TutorialΒ 

Hey, my beauts ! I hope you all had a lovely weekend, I knew mine flew by which was crazy ! But I had a great time ! Was wondering what to do this Sunday and I thought why not capture the fall copper makeup look I promised you guys on insta ! If you are not following me on insta yet be sure to do so, thatothertwin_xo. I am going to be using my lovely and beautiful morphe 350 shimmer palette for this look ! Literally bought it in the mall for $40.00, which was fantastic! I haven’t used it in a while but the colours are fantastic for fall so I might as well take it out and play around with it! Shall we begin ?!


I first am taking this beautiful white shimmer from the palette and applying this to my inner corners of my lids. I love how pigmented each of the shades are!

Next, I am going in with this gorgeous copper shade and applying this to the other half of my lid from the middle and carrying it to the outside of my lid. I am ensuring that I am also blending this in my crease with a fluffy brush.


I am then taking this slightly darker copper shade and applying this into my crease as well! This is a beautiful transition shade that looks absolutely stunning with this look! I applied a tiny bit of this shade underneath my lower lash line as well. I then am going in with my black liquid liner and applying this to the top of my lash line, also going in with my mascara as well. I applied a nude shade to my lips to create a more everyday look that’s gentle for fall! And voila!


“She has fire in her soul & a killer set of brows “


I hope you beauts enjoyed this stunning and gentle makeup look that’s appropriate for everyday wear! Be sure to follow my other social media accounts located on my home page to stay in the loop and stay updated! Take care guys.

img_3261-13

Fall Makeup TutorialΒ 

Fall Makeup TutorialΒ 

Let the grunge begin! Hello my beauts , welcome to my Channel if you are new ! My names Alyssa and one of my hobbies are doing makeup and sharing my ideas with you beauts ! Β My favourite season is fall mostly because I love pumpkin flavoured anything really! I’m that “ basic bitch” as some may call it, but I don’t mind one bit. Β I am going to be using my Modern Renaissance Palette by Anastasia BeverlyΒ Hills for this look, and let me just say, it is is super easy to achieve. Β Let’s get started!

First and for most, I ensure that I have a nice clean face before applying all my face makeup such as my foundation, powder and so forth.

I am then taking the shade, “Antique Bronze” and applying this all over my lid with a small eyeshadow brush, and blending this shade out into my crease as well using a fluffy brush. This is a very pigmented shade, so be sure to blend thoroughly and have a lot of patience.

Yes, you are going to look a bit like a racoon here but I promise you, the finishing look will be worth it! Next, I am going in with the shade “Burnt Orange” and applying this to my crease as well as underneath my lower lash line. Β Then I am going to apply some black liquid liner to my lids, and apply a tiny bit of mascara to my top and bottom lashes. I then applied some false lashes, and voila! Your eyes are ready for that fall weather! I absolutely love this grunge look and it’s perfectly acceptable for this kind of weather. I also applied the shade “Velvet Teddy” onto my lips to tie the look in altogether.

“And all at once, Summer collapsed into Fall…”


I hope you beauts enjoyed this fall makeup look that I have created and try it out for yourselves. Be sure to follow my other social media accounts located on my home page for more blog posts to come in the near future, take care!

img_3261-13

Back to school makeup tutorial ( neutral)Β 

Back to school makeup tutorial ( neutral)Β 

It’s that time of the year again beauts ! Some people are dreading it, others enjoy it and some people look forward to it. Yes… I am talking about back to school. Personally, I am not looking forward to it but hey … if that means close to being done school then that’s what I am looking forward to! I mean… who doesn’t want to be done college right ?! I am currently in college for social service work and really am enjoying it. I just finished a placement over the summer and have another placement in October that I am going to be given so I am looking forward to that! How about you guys ?! You excited school is tomorrow or what ?! Don’t sound too excited now … easy there. I thought I would share with you guys what I usually wear makeup wise to school, I don’t go crazy but I make sure I look decent for school all the time. I always like to wear easy makeup to school because let’s face it … who likes getting up extra early to get ready for school in the morning? Not me. I would rather be sleeping personally. Β So I came up with this look for you guys, it’s super easy pretty much consists of two shades within the Beverly Hills Modern Renaissance Palette! Shall we get started ?!


First I make sure I start off with a fresh clean face! Nobody likes a dirty face. I then start to apply all my face projects such as foundation, powder, you get the picture.Β 


I then am going to quickly fill in my brows for you guys off camera and quickly contour and highlight my face.


After this is done, I will grab my primer for my eye lids and prime those bad boys up for my eye shadow! I am going to go in with the shade “Primavera”, and apply this shimmery cream shade all over my entire lid, ensuring that I get the inner corners.


I then am going in with a shade from my Kat Von D Shade Light Eye Palette, the light brown shade. I am using the light brown shade that’s the first on the left-hand side of the palette. I am using a fluffy brush and apply this to the crease of my lids.


After applying these two shades I am quickly lining the top of my lids with a black liquid eye Liner, grabbing some of my favourite mascara and applying this to my lashes. I then am grabbing a light pink lipstick to add a pop of colour to my lips and voila !


Lets fix that hair !Β 


“… I could stop buying makeup but I’m not a quitter ”Β 


I hope you beauts enjoyed this really easy and simple neutral makeup tutorial. Let me know if you guys try it out! Be sure to follow my other social media sites located on my home page for upcoming blogs in the near future!

img_3261-13

Summer Natural Makeup Look

Summer Natural Makeup Look


Good morning my lovely beauty ! I hope you guys are having a wonderful Friday morning! I know I am, got to finally sleep in instead of having a boring 8:30 am class! Fridays off are the best days by far! Now that classes are done and I am going to be starting placement, I hope I can get some more blogs in there for you beauts because honestly … who doesn’t love blogging.  Blogging for me is so therapeutic and literally gets everything off my chest, absolutely love it. I decided to come up with a very very natural look for you guys! This is completely wearable for any occasion, even if you wanted to go to beach you could totally wear this! I don’t know about you guys, but I still love wearing makeup to the beach, not a lot but enough in case you bump into someone and don’t look like a complete zombie, am I right? Lets jump right into this! So for this look guys I’m jumping in with my lovely Naked Palette , you can’t go wrong with this guy, the colours are so neutral and warm , I love it.


Starting off with a fresh face I am going to apply all of my foundation( keeping it light and not heavy), my powder and so forth. I am also going to be filling in my brows as well…in case you have no noticed… I have like zero brows.


That’s a bit better! Love it! Now that I actually have some brows , and covered up those imperfections on my face, I am going in with some contouring and highlighting. I literally can not go a day without this step. I am pale as fuh so I have to act tanned somehow right ?


I am first going to take the shade , “Naked” and apply this to the crease of my lids with my lovely fluffy brush. After blending this out well, I am going to in with the shade “Buck”,  and apply this overtop of that first shade, just emphasizing the crease more.


I am then taking the original first shade, “Naked”,  and applying this shade as well to the centre of my life. I absolutely love this shade I think it’s so subtle yet you can still notice it . After applying this, I am going to take the shade , “half-baked”, and apply this overtop of the centre of my lids. This colour is stunning , and the sparkles remind me so much of summer and being in the sun. Just the perfect match!


I then went in with a brown liquid eye gel this time as opposed to black to create more of a natural look and not appear so dramatic. I applied this to the top of my lids.  I then went in with my mascara …don’t mind me …my mascara came with a primer on one end, And applied this to my lashes.


You ready for the fun part? How about let’s add in some fake freckles? I simply used the liquid eye gel in brown, and applied little subtle dots to the top of my nose, cheeks and underneath my eyes. Voila! Now you are rocking some fake freckles!


( you want to ensure your freckles are very subtle and gentle!) 


All I need is coffee and mascara”


I hope you beauts enjoyed this lovely natural summer makeup look. I love looks like these once in a while, you can’t go wrong whatsoever! Make sure you follow my other social media accounts located on my home page for the latest blog posts ! Be sure to subscribe to my channel as well!

Subtle Purple/Pink Smokey Eye

Subtle Purple/Pink Smokey Eye

Hey beauts , I hope you guys all had a fabulous Thursday! Just think … tomorrow is Friday! Thank God , and no more classes for me just placement on Monday ahh!! I decided to do this blog post today on a nice subtle purple/pink smokey eye that I came up with using my naked 3 palette, which is an absolutely stunning palette that I will always LOVE.Β 


So shall we jump right into it or what ? You can honestly wear this look for daytime or night time I would just highly recommend for daytime , using less of the shade ” Blackheart”.

So first things first I am going to start off with a fresh face , right away I went in and applied my foundation , powder and all that jazz. I skipped adding this in the tutorial as stated previously in my other posts , I usually stick to the same full face routine , so go ahead and check I out in my other blog posts !


I already went in and applied my eyebrows as well , and also an eyelid primer before moving onto the eyes!

The EyesΒ 

Β So right away I am going to grab my Nakes 3 palette which has all these gorgeous pink shades and apply “Mooner” within the crease with a fluffy brush . I am going to ensure that this is all blended out nicely and that there are no harsh lines !


After applying this medium shade within the crease, I am going to take the shade “Strange” and apply this to the inner corners of my eyes. This is going to help brighten up your eyes! Next, I am going to take the shade “Buzz”Β and apply this to the middle of my lid. This is a beautiful soft sparkly pink which I adore, and it really gives off the gentle look.


After applying this subtle shade to the centre of my lid, I am going to take the shade ” Blackheart“, and applying this to the outer corner of my eyes, the outer V. This is going to create that beautiful smokey eye look, adding a hint of purple to the lids. I added a bit more of this pigmentation to create more of a dramatic look but you can go how dramatic you wish!


I then went in and applied some mascara, added in some false lashes and some stunning purple lipstick to complete the look!


And voila! You are ready for that hot date or a day out in the sun! You choose!


I could stop buying makeup… but I’m not a quitter”Β 


I hope you beauts enjoyed this super easy makeup tutorial! Be sure to check out my other social media accounts located on my home page for more blog posts to come in the near future! Let me know if you beauts try this look out !Β 


Summer Makeup Tutorial featuring LaurensLipGlossary!Β 

Summer Makeup Tutorial featuring LaurensLipGlossary!Β 


Hello, gorgeous!

My name is Lauren Will! I’m a licensed esthetician, fashion lover, and the girl behind LaurensLipGlossary.com! My blog is getting quite the makeover and won’t be back online for another week, so this does make for the perfect time to do some guest blogging.

I started following Alyssa’s blog earlier this year. As someone who also struggles with anxiety, I felt so connected to her and what she had to say. Another thing we have in common? We are both passionate about beauty and makeup!
One of the reasons I love makeup so much is that it can change the way I feel entirely, even if I’m having the most brutal day! It can be as simple as putting on my favorite lipstick, taking a breath, and reminding myself that I’m a boss bitch ;)! Seeya later, anxious thoughts!
In Vancouver where I live, it’s cold and rainy today. No need to worry though, this makeup look has got me feeling anything but gloomy! The bronzey eyes and coral lip are giving me major summer vacay vibes.

KEY PRODUCTS
EYES
MAC Paint Pot “Soft Ocre” – This will make sure those shadows stay put all day long.

Artist Couture Diamond Glow Powder “Lickable”

MAC Eyeshadow “Saddle”

FACE
Loreal Lumi Foundation – I mix in a few drops of the Loreal Lumi Liquid Glow N201 for an ultra dewy complexion.

Make Up For Ever Pro Sculpting Duo “02”

LIPS

Clarins Lip Perfecting Base – I find when I use this, the lipstick placed overtop always looks extra pigmented and stays put way longer!

NYX Ombre Lip Duo “Peaches and Cream”


Does makeup also have a way of changing your mood? Let me know what you think in the comments!
Thanks again to Alyssa for having me! You can find me on Instagram (@LaurensLipGlossary) and my blog, LaurensLipGlossary.com!


 Xoxo Lauren Will

A Hint of Gold-Spring Makeup TutorialΒ 

A Hint of Gold-Spring Makeup TutorialΒ 

Hey there my gorgeous beauts! Welcome to my channel if you are new! I decided to change things up again a bit and show you guys a makeup tutorial that I came up with! This one is inspired by spring of course, and is called “a hint of gold “. I am going to be incorporating a gorgeous purple shade by the lovely Modern Renaissance Palette, and add a hint of gold using my Naked Palette. This is a very easy tutorial and I wanted to pass on this look to you beauts! It obviously helps to add a purple top in with this look, just to complete it! Shall we get started?

Cleansed FaceΒ 


1) First ensuring that my face is completely washed and primed! My face has been hating me recently, I usually get breakouts on my chin, if you guys have any suggestions on how to get rid of that acne let me know!

Cover them pimps!Β 


2) Voila ! That’s a little bit better ! I did my normal everyday face routine using all of my facial makeup applicators including my lovely beauty blender! I also applied my contour and highlighter.

The EyesΒ 


3) Going in with my beautiful Modern Renaissance Palette , I am going in with the purple shade labeled , “Buon Fresco”, and applying this all over my entire primed lid. I am dragging this colour into the crease as well just to ensure every part of my lid is covered. Applying this to my crease as well helps the colour look more blended and not so harsh.


4) I am then going in with the lovely Naked PaletteΒ and taking the shade “Halfbaked”, and applying a small dab, literally one stroke, to the middle of my lid. This helps create the spotlight effect that I discussed in my previous blog posts and looks absolutely stunning, hence the hint of gold.


5) I am then done with the eyeshadow of this look, yes it was that easy, Β and now adding a winged liner and mascara.


6) Of course, I need to add some false lashes, this is optional! I absolutely love the way of false lashes complete any look and pull it all together . I also put on my favourite lipstick ever, the NYX Cosmetics Liquid Lingerie Lipstick in the shade ” Embellishment”, and applied this all over my lips. I added a few more accessories to the look as well such as a beautiful light purple satin choker.


And voila! A gorgeous purple spring look with a hint of gold, perfect for day time and night time.


On a bad day, there’s always lipstick”Β 


I hope you beauts enjoyed this short makeup tutorial perfect for spring! Make sure to follow my other social media accounts located in my bio for the latest updates!


Ocean Blue Makeup Tutorial

Ocean Blue Makeup Tutorial

​

​
Hey beauts, hope you are all having a wonderful weekend, or should I say, had a wonderful weekend! It has been an extremely stressful week for me, so I have not been really on the ball with blogging lately, I do apologize for that and will try to pick it up again so just bare with me here! Thanks guys! I decided to throw in a makeup tutorial for today, as I have not done one in forever and wanted to change things up a bit. My sister recently gave me this beautiful Sephora blue single eyeshadow and the first thing I thought of was, “what the hell am I supposed to do with that..?”. I never really use colours as you guys know, I mostly stick to my neutrals and away we go! I came up with this beautiful look today using this ocean blue shade, I hope you guys like it ! Again, If you guys are interested in what products I use on my face, just skip back to my previous makeup tutorial posts where I go step by step on which products I use. To same time and to not repeat myself, I decided to just show you beauts my eye makeup. Shall we get started?!

  1. First, I primed my eyes with my absolute favourite eye lid primer called the “Kat Von D High Voltage Primer”, from Sephora. I am going to have to repurchase this product as I am now running super low!

2. I am now going in with the beautiful colourful glitter blue eyeshadow I think called “Curacao Punch”, and applied this with a small eyeshadow brush all over my entire lid.

3. I am then going in with my “Kat Von D Shade and Light Palette”, and using the black for the smokey eye effect. I am applying the black to the outer V, and blending this out, slowly building up the pigmentation.

4. I then am using the same palette and taking a lighter cream shade to apply this to my inner corners of my eyes, highlighting them and making them stand out more. I am then adding some finishing touches onto my eyes such as some mascara, a winged liner, and also adding a bit of the black eyeshadow underneath my eyes.

“Home is where your makeup stash is”

I also took a nude lipstick and applied this to my lips. I thought nude would be the best shade to ensure this look is not overly dramatic and that the lips do not overpower the eyes.

“Don’t let today be a waste of makeup”

I hope you guys enjoyed this extremely short and easy makeup tutorial. This is so beautiful for a night out or if you are feeling spontaneous, you can wear this during the day as well! Be sure to follow my other social media sites located on my home page for more updates on my latest blog posts! Have a great week guys!


img_3261-7